Have you ever wondered how I add that beautiful gold shine to my linoprints?
In this post, I’ll show you how I use gold embossing powder to add a little sparkle to my linoprint Holy Cow. I’ll also share the materials I use and explain how the process works.
You don’t need a printing press for this technique, and the results are worth the extra step!
Before we start, a little disclaimer: I’m not an embossing expert! I actually tried this technique for the very first time with my Holy Cow linoprint. But I enjoyed experimenting with it, so I wanted to share my experience, the materials I used and what I learned along the way. If you’re new to embossing too, perhaps my experience will help you get started!
Affiliate disclosure: Some links in this post are affiliate links. If you make a purchase through these links, I may earn a commission at no extra cost to you. As an Amazon Associate I earn from qualifying purchases.
Materials I used
For my first gold embossing experiment, I used the following materials:
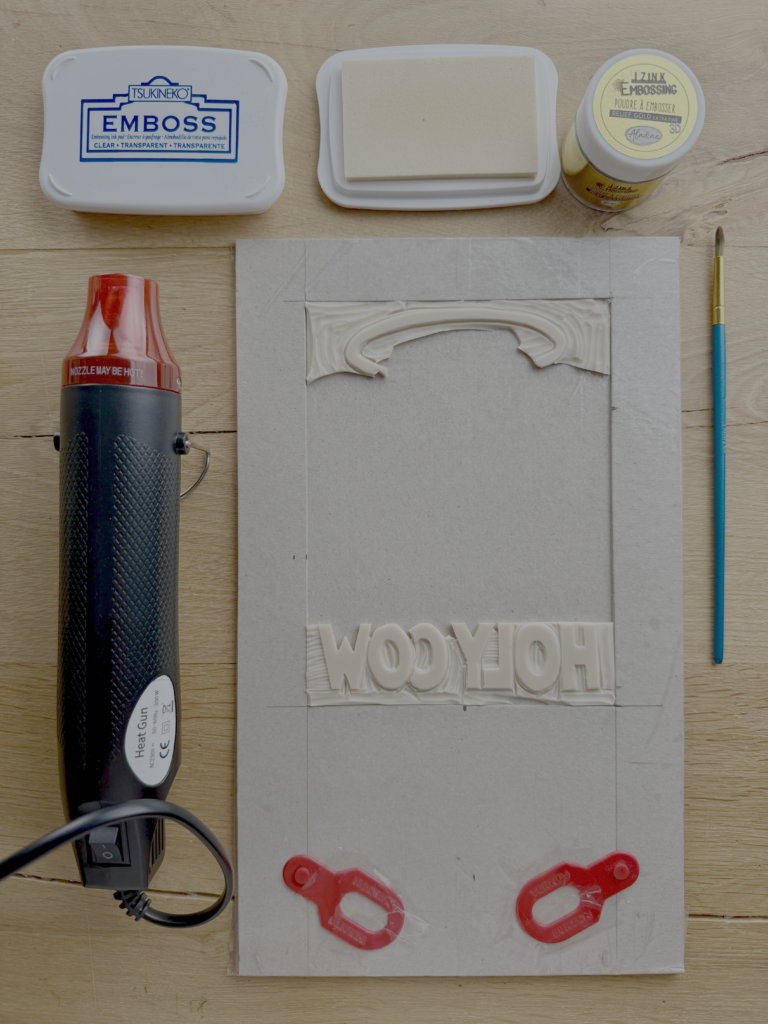
- Emboss Ink Pad to make the powder stick to the areas you want to emboss.
- Embossing Powder Gold Extra Fine that melts into a shiny, raised metallic finish when heated.
- Mini Heat Gun to melt the embossing powder.
- A soft brush to remove any loose embossing powder before heating.
- My mounting board with Ternes & Burton pins and tabs to make sure the paper is aligned in exactly the same position each time.
- My linoprint in this case, Holy Cow, the print I used for my first gold embossing experiment.
I bought the three embossing products on Amazon. You can find them here:
- Tsukineko Emboss Ink Pad Clear (affiliate link)
- Aladine Izink Embossing Powder Gold Extra Fine (affiliate link)
- QWORK Mini Heat Gun (300W) (affiliate link)
Step-by-Step guide
Step 1: Apply the clear embossing ink
I gently dabbed the Tsukineko clear embossing ink pad onto the raised areas of my lino block. These are the areas that transfer the ink onto the paper when printing.
Step 2: Position the linoblock and paper
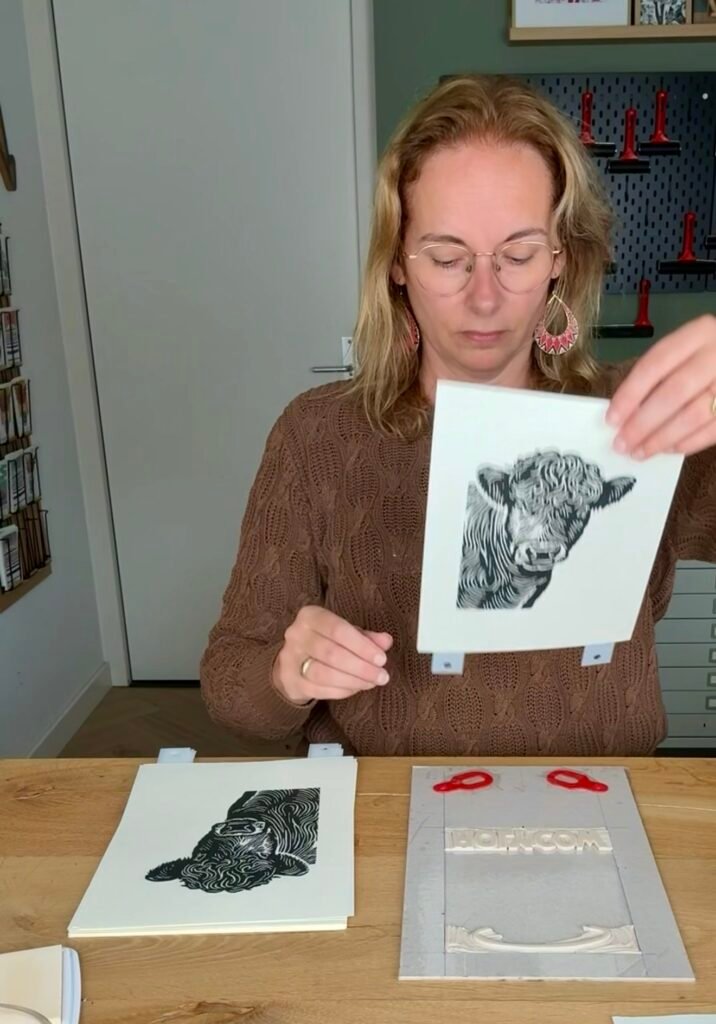
I placed my inked lino block on my mounting board, which has Ternes Burton registration pins attached.
My paper has matching tabs that click onto the pins, allowing me to position the print exactly where I want it.
I might write a blog post about my mounting board in the future. In the meantime, you can watch a video about the making of a mounting board on my instagram
Step 3: Make the print
I made the print using my printing press. You can also use a wooden spoon to transfer the image by hand.
Once the print is finished, I carefully remove the paper. At this point, you won’t see anything yet because the embossing ink is transparent!
Step 4: Add the gold embossing powder
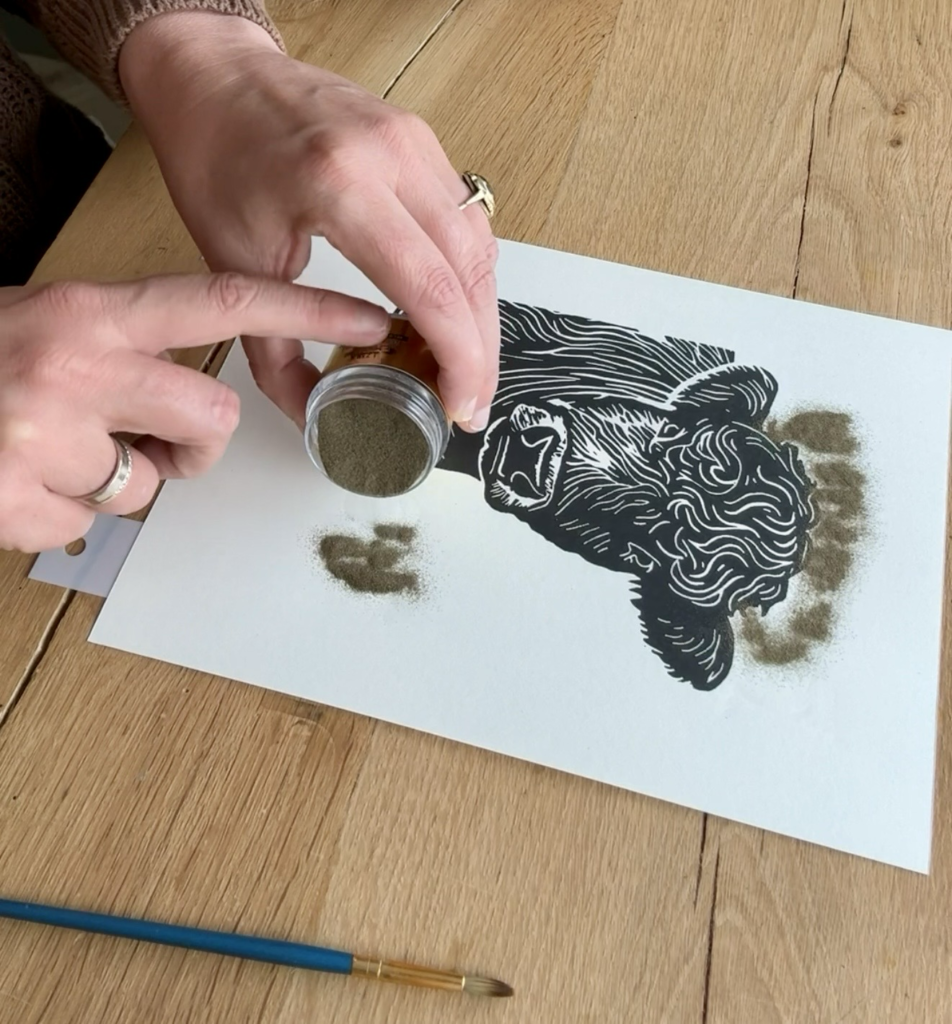
While the embossing ink is still wet, sprinkle the gold embossing powder over the areas where the clear ink has transferred onto the paper.
Gently tap the back of the paper to help the powder settle. Then tilt the paper and let the excess powder slide onto a clean sheet of paper. You can pour it back into the container and reuse it next time, so don’t throw it away!
Step 5: Remove any unwanted powder
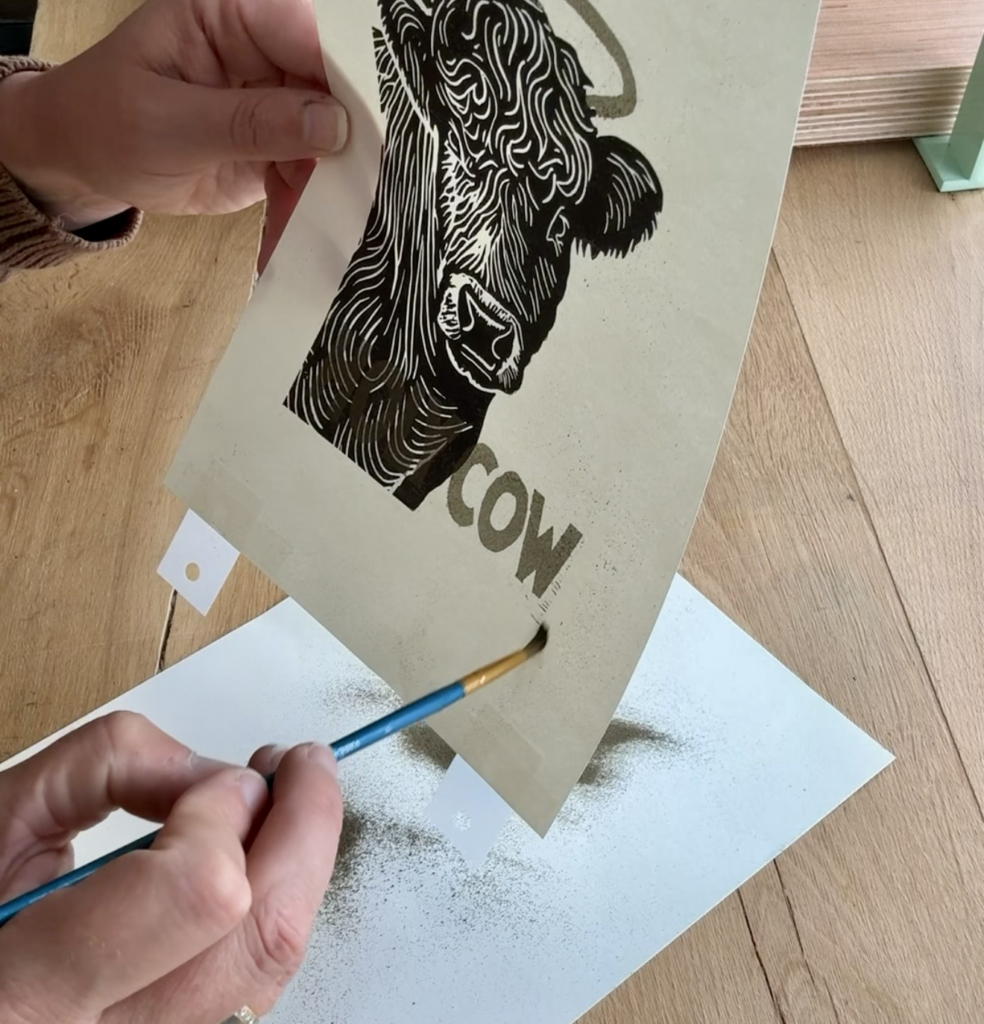
Use a soft brush to gently remove any loose powder that has stuck to areas where you don’t want the gold effect. After brushing, I gently blew across the paper to remove any remaining powder that wasn’t sticking to the embossing ink.
In my case, there were a few little spots where the powder had stuck to the paper because my clear embossing ink had picked up some chatter (small, unintended marks caused by uneven contact with the lino block).
Tip: Using a mask to protect the areas you don’t want to emboss can help prevent this. It’s something to consider if you want cleaner, more precise gold details. Although, let’s be honest, who would complain about a little extra gold? 😉
Tip: Take a moment to check your print carefully before using the heat gun. Once the powder melts, any unwanted gold specks will be much harder to remove.
Step 6: Heat the embossing powder
Now it’s time for the magic! Use a heat gun to warm the embossing powder. As it heats up, the powder melts and transforms into a beautiful, shiny gold finish.
A few practical tips:
- Put the sheet of paper with your leftover embossing powder safely aside first. The heat gun blows out air, which can easily scatter the powder and send it flying across your workspace or onto the floor.
- Hold the heat gun at a suitable distance and keep it moving, following the manufacturer’s instructions. Avoid concentrating the heat on one spot for too long, as this could damage or scorch the paper.
- The heat gun gets very hot, so handle it carefully and let it cool down safely after use.
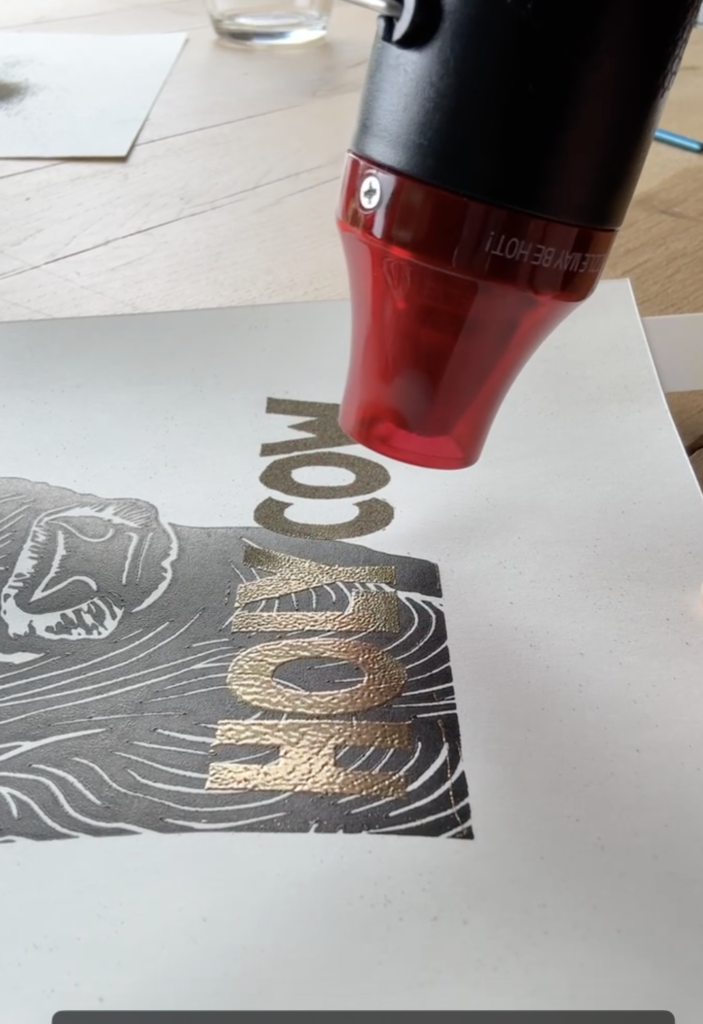
Watch as the powder melts and the gold details appear. And voilà, your linoprint has a beautiful, shiny gold finish!
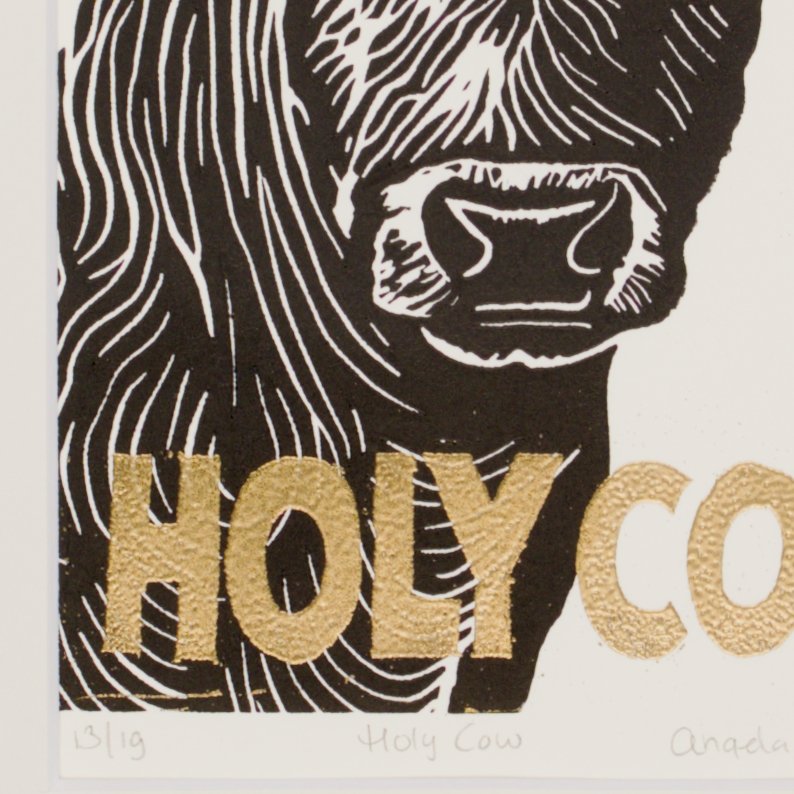
The finished print: Holy Cow!
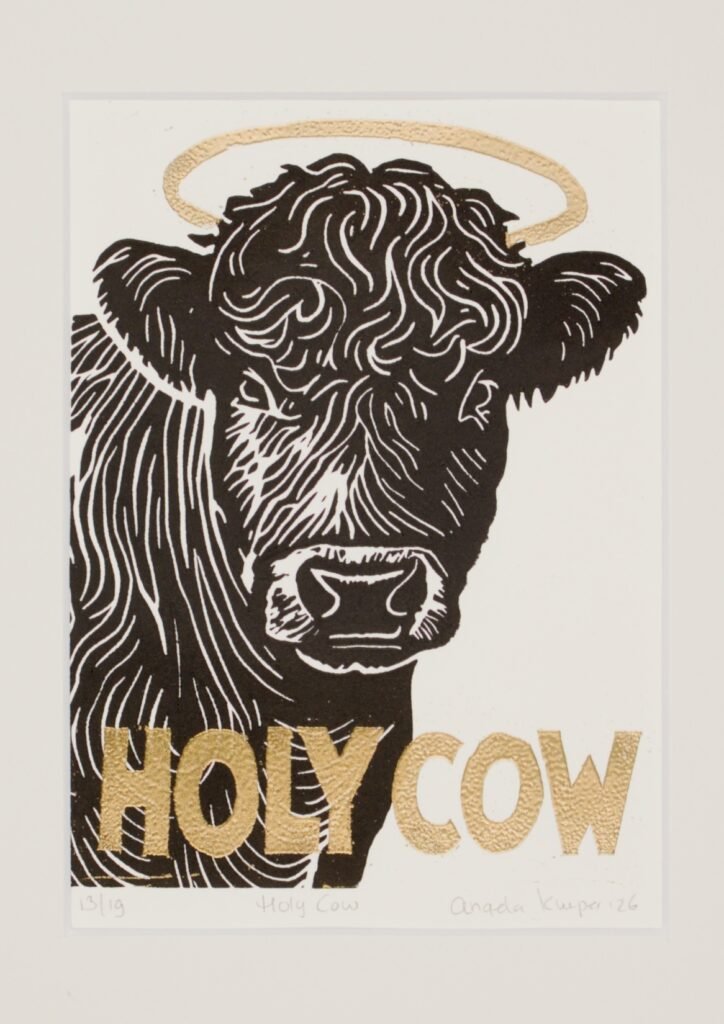
I love how the gold adds an extra dimension to Holy Cow. The metallic details catch the light and give the lettering and halo a little something special.
Holy Cow is available in a limited edition of just 19 prints, priced at €29.95 each.
You can find the print in my webshop.
What about you?
Have you ever tried embossing your prints, or is it something you’d like to try?
I’m still experimenting with this technique myself, so I’d love to hear about your experiences and any tips you might have.
Feel free to share your work with me or drop me a DM on Instagram. I’d love to see what you create!